
Pretty ridiculous right? I don't want to tell you how many of these outrageously priced fluff balls I've purchased for my not-even-2-year-old daughter. She literally has a closet full. No more, I say!!
Have I gone insane? Do I no longer desire to have my most precious female anklebiter draped in lacy, beautiful tulle? Of course I do! I (& my wallet) just refuse to pay out the wazoo for them! I knew I could do this myself... and when I finally did, I was pleasantly surprised how easy it actually was!
Here's what I used:
- A Crochet-Style Elastic Headband (make sure it's stretchy enough to fit over the waist of the recipient rugrat)
- Approximately 6 Yards of Tulle (total)
- Ruler or Yardstick
- and Scissors


The first thing you're going to want to do is cut your tulle into roughly about 6" x 28" strips. Measuring REALLY isn't my thing. You could just throw out the ruler and eyeball it if you like living on the edge. Or be creative and cut them all different sizes. It's really up to you. I used my ruler as a guide, but didn't sweat it if my sizes weren't exact. It's how I roll.

See those openings there in that headband? That's where we're going to be working. The headband I used had metallic strings in the openings... yeah, I just pretended like they didn't exist and poked right through those suckers.
Take one of your tulle strips and fold it in half. Then, thread the fold through one of the openings in the bottom row in your headband. Pull it through about an inch or so.


Next, reach through the loop and slide the rest of the tulle through it. Pull tight.

Got it so far? Great! Now, just keep going around the circumference (whoa, big math word) of the headband.


Has the arthritis set in yet? If so, you could just stop at this point with a dinky, boring tutu. OR, you could be awesome. Your choice.
If you chose to be awesome, take this moment to pat yourself on the back. You're doing great! Ok, that's enough.

Now, move up a couple rows in your headband.
Right... about.... there.
Take your remaining strips of tulle and cut them in half right through the width. That's right, Sherlock. They're 14 inches now. Genius.
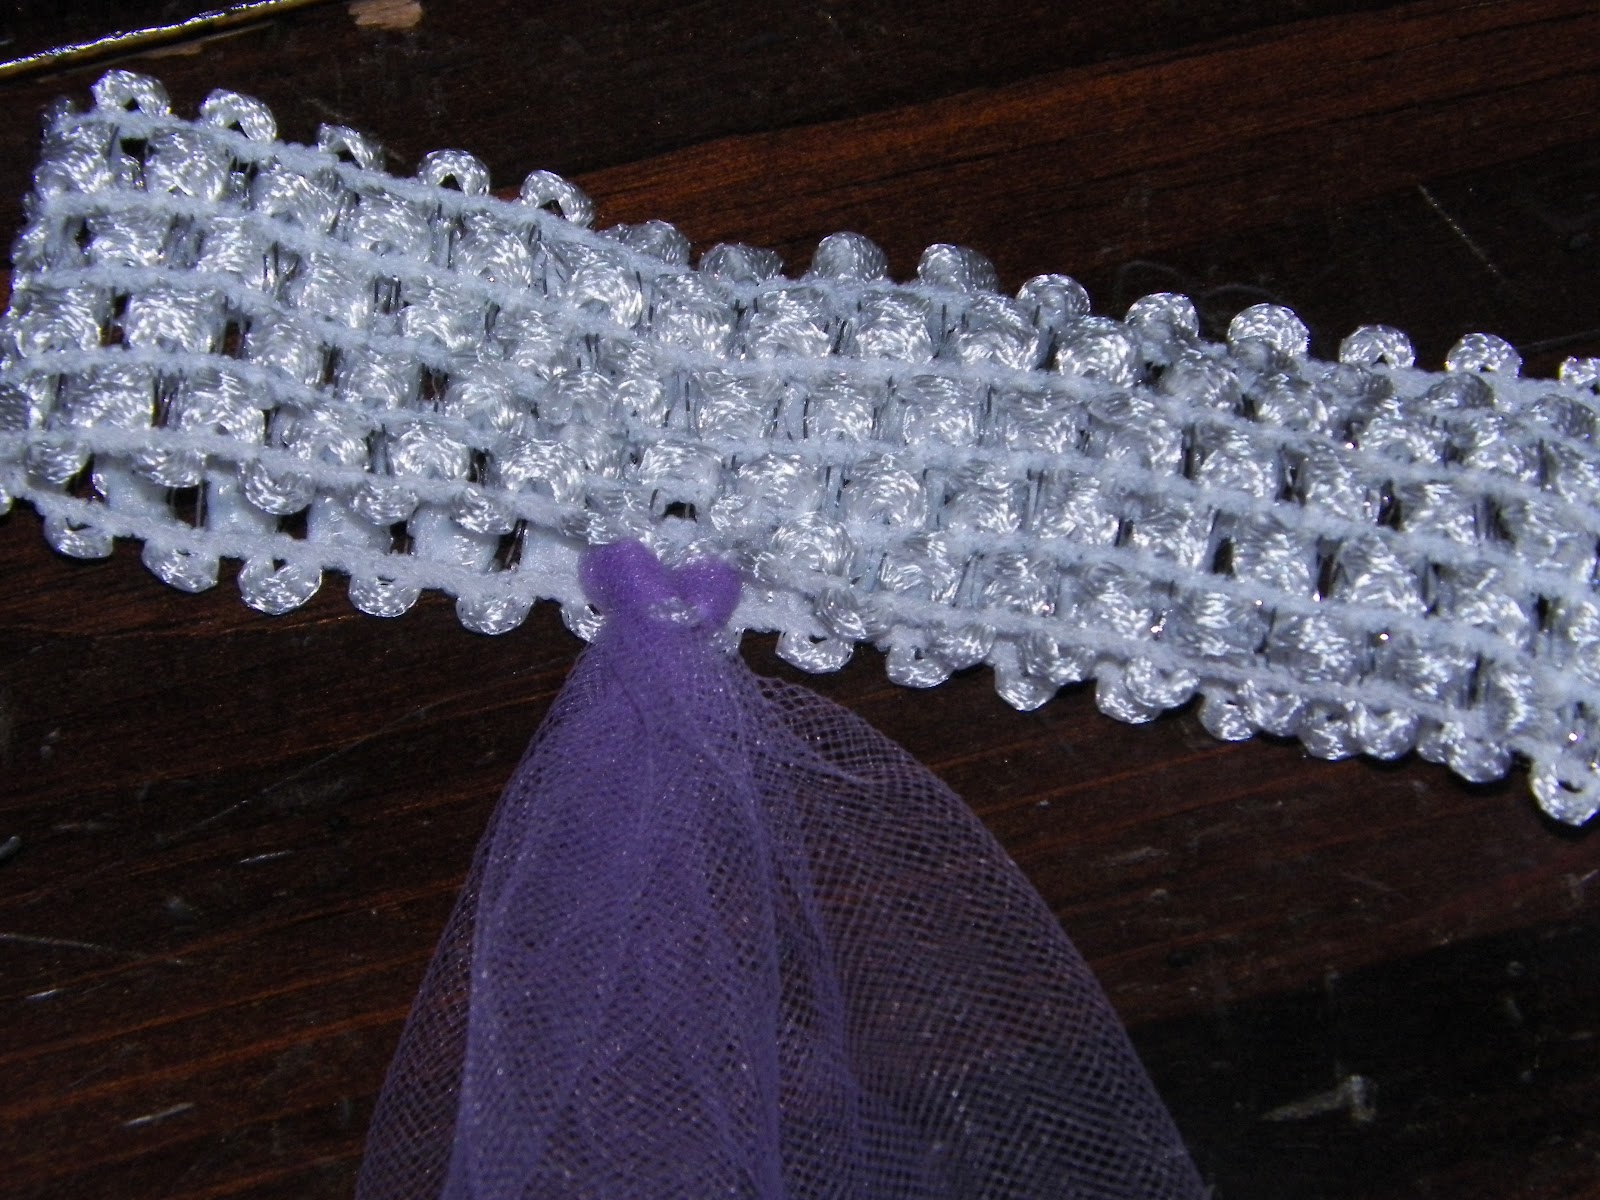
Take one of your (now shorter) strips of tulle and thread it halfway through and then back through two consecutive openings in the headband (left picture). Then tie a simple overhand knot.


Again, just keep going. This will create a fun halo effect around the top of the skirt. It will also hide the remainder of the headband.
The inside of the band should look like this when finished:

Last, but not least, tell NO ONE that you made it yourself. I know you're probably real proud of your effort & result, however, don't say I didn't warn you. Next thing you know, Mrs. Fisher is going to want all the girls in her first grade class room to have one and you are going to be one tulled-out mama. Better yet, tell them you found this really fantastic blog that offers some nifty DIY ideas! *wink*
Feedback on this tutorial would be great! I've only done one other, which you can read here, where you'll learn to keep the kiddos from pestering you busy with Bubble Snakes.
In the famous words of the great Biz Markie: "See ya'll next time. Bye-bye!"
~Angela
No comments:
Post a Comment